Kometen
Kometen står färdig efter motorbytet, vi lät köra ut den för fotografering i det fina vädret.
The speeder ”Kometen” was rolled outside in the nice weather to be photographed . The old lawn mower engine has been replaced by a more reliable small one cylinder diesel engine with electric starter and continuously variable transmission (CVT, Variomatic). Note the brass plate for the throttle lever.

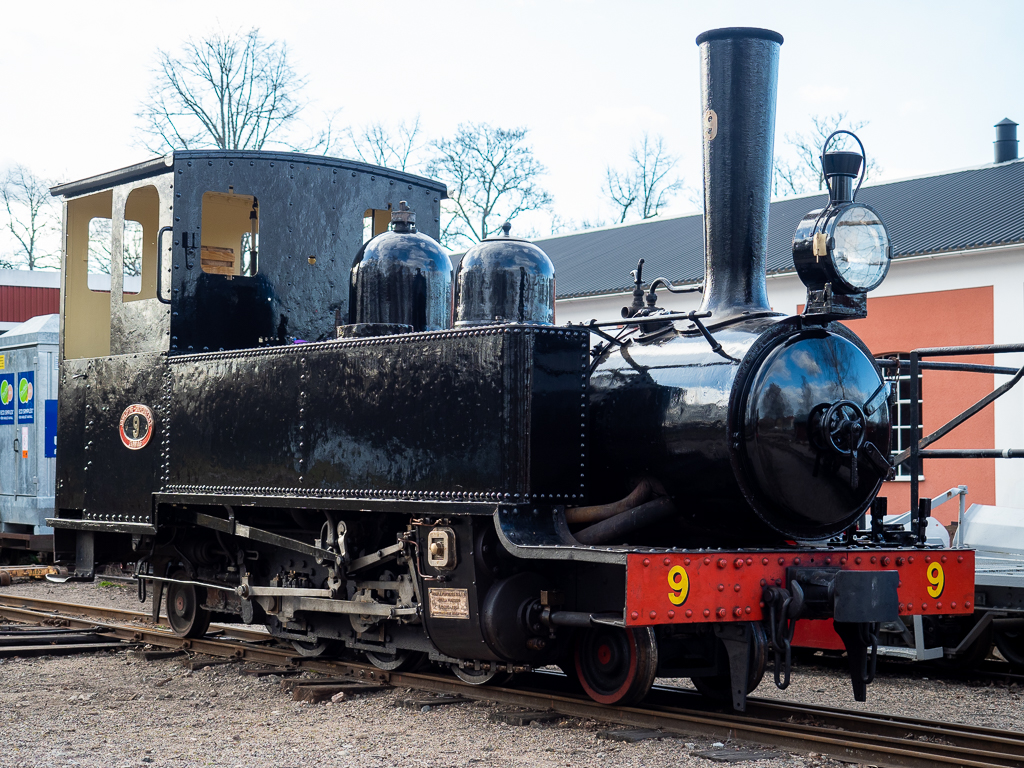
JGJ 9 Nian.
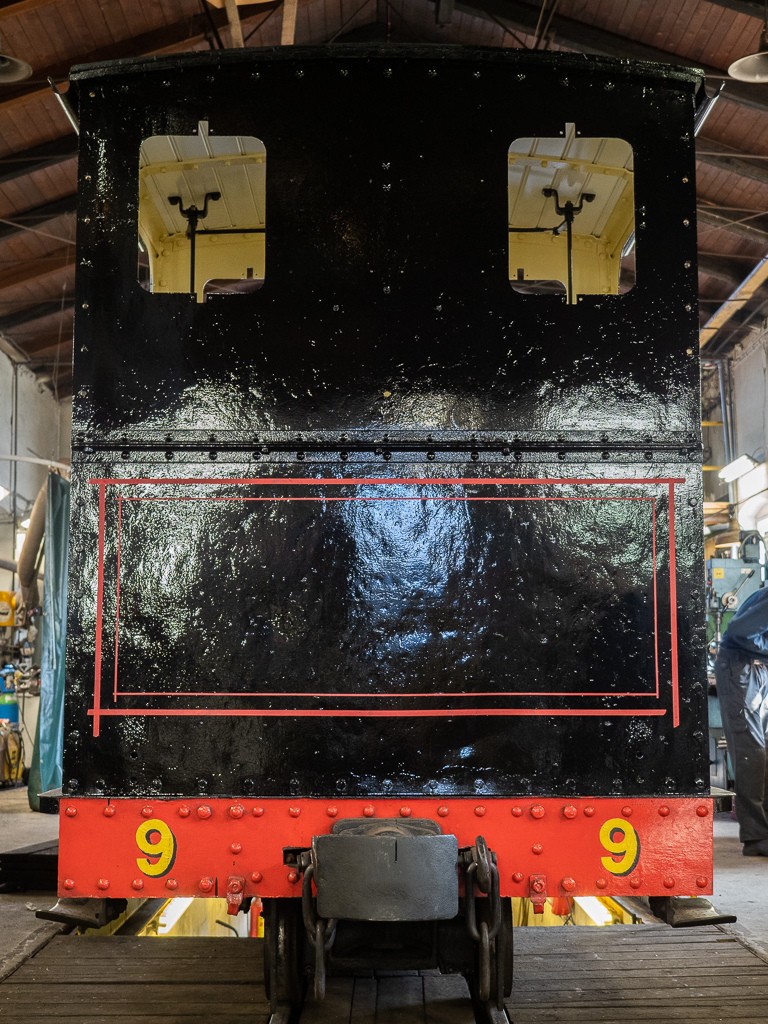
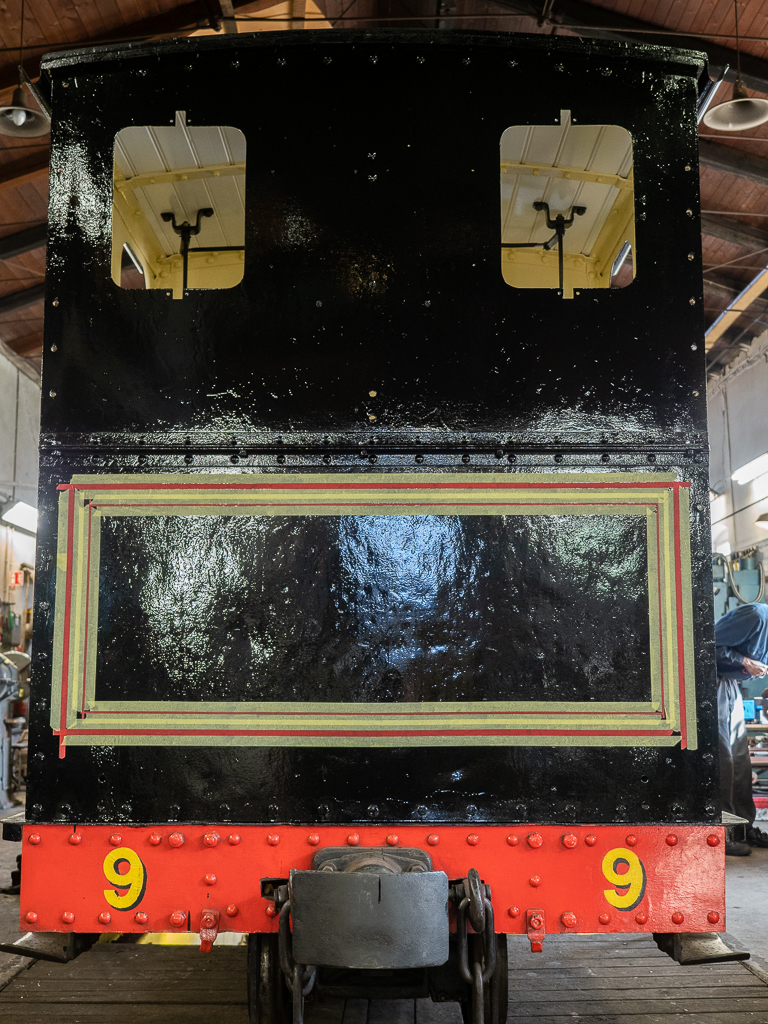
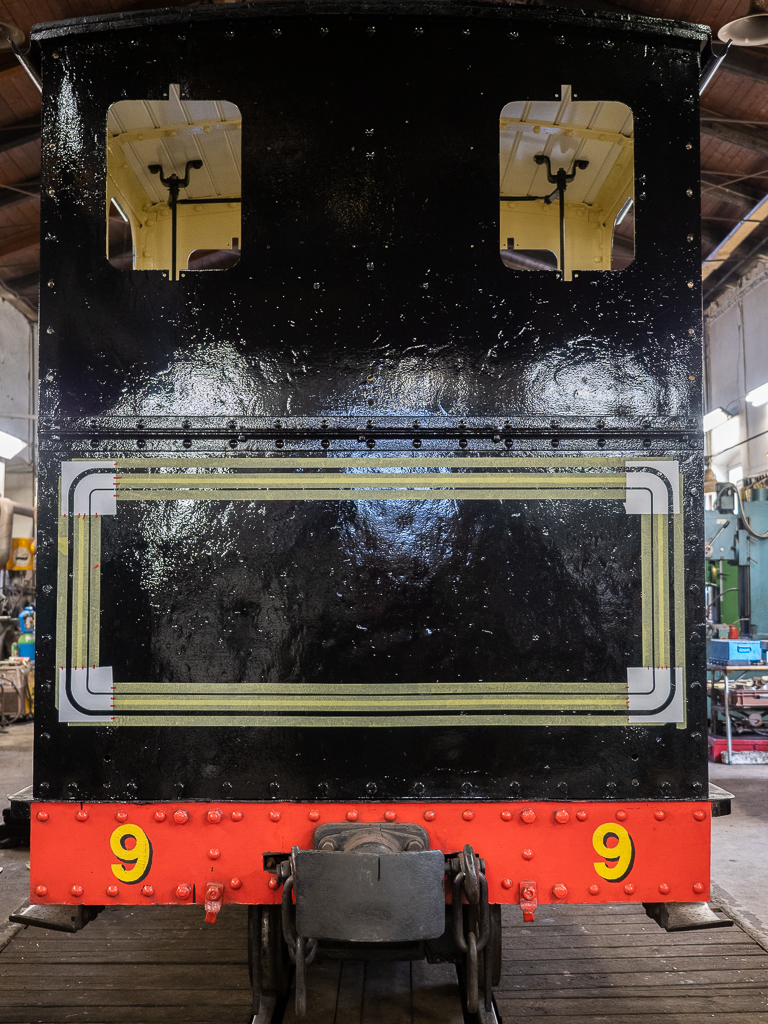
Under påsken inledde vi jobbet med linjeringen. Detta moment kräver mycket tålamod och är bitvis väldigt pilligt. Vi vill med stor noggrannhet komma så nära linjeringen på leveransfotot som möjligt.
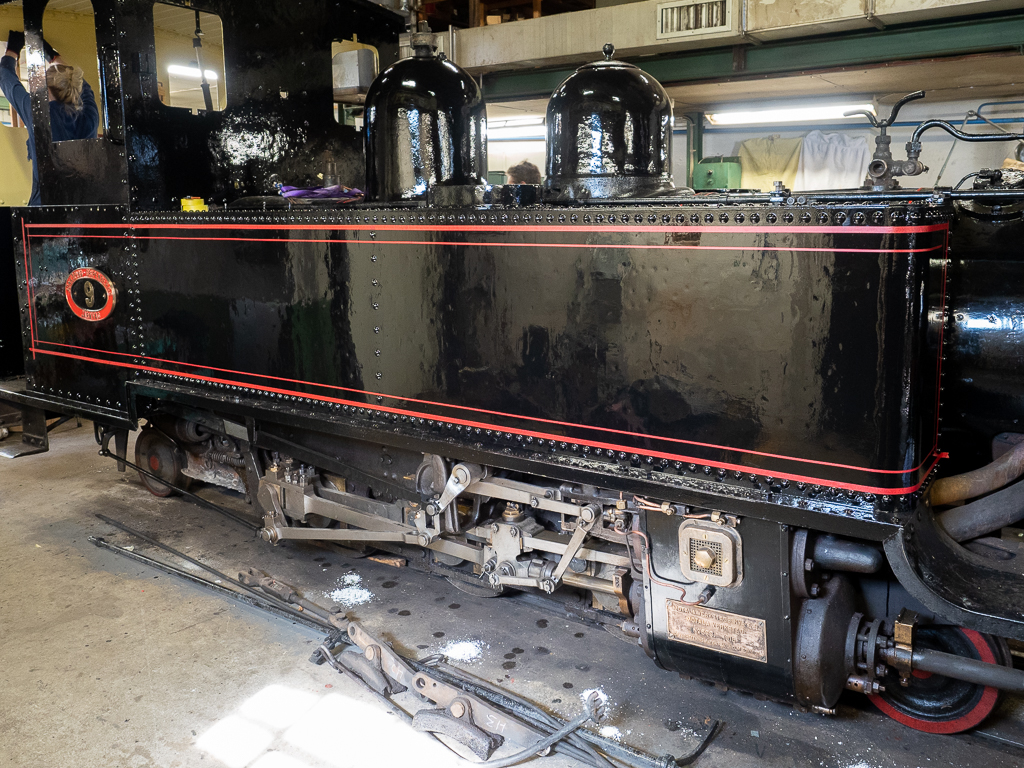
När vi skulle linjera lok nr 5 Hamra började vi titta på hur vi skulle gå till väga. Efter lite klurande kom vi fram med en metod som gav bra resultat på Hamra och vi valde att göra på samma sätt med Nian.
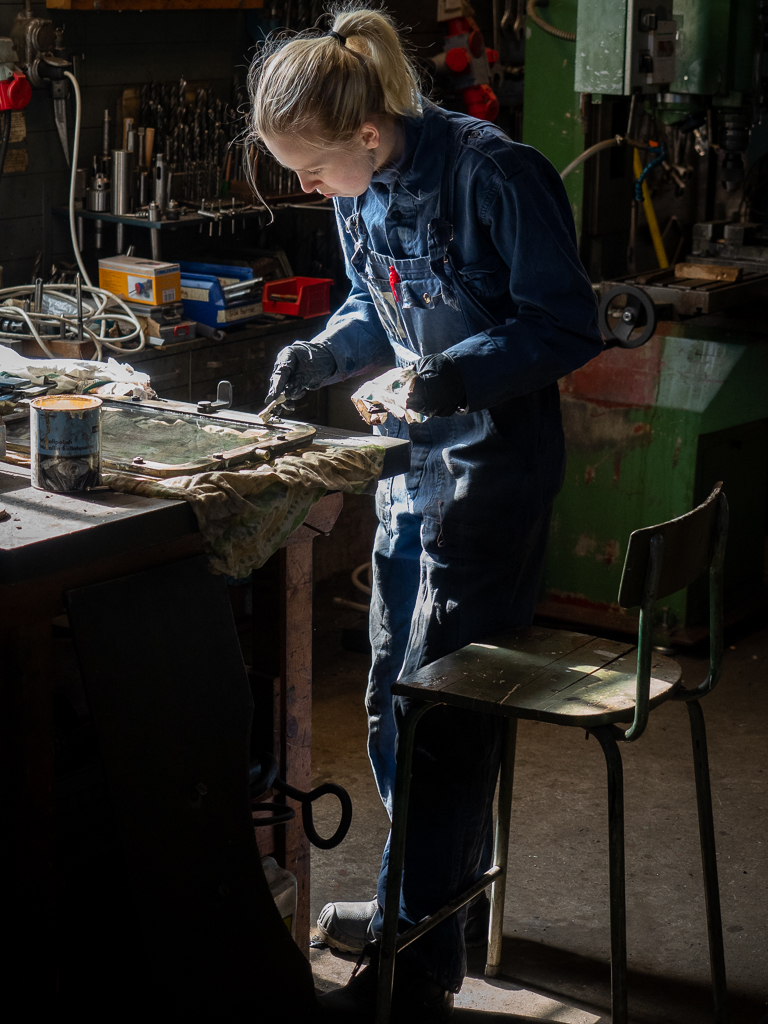
Det hela bygger på att först markera ut linjerna med tejp som har exakt samma bredd som linjerna sedan skall ha (15+5 mm), efter det maskerar man runt markeringstejpen och slutligen använder vi schabloner som är gjorda efter Nians leveransfoto för hörnen. Detta gör att det dels är enkelt att mäta för att få linjerna raka och på precis rätt ställe men också se hur helheten blir innan vi målar.
During Easter, work progressed with lining out the water tanks, back wall and sides of the cab. This task required a lot of patience as well as a lot of painter’s tape.
We measured out the position and widths of the lines on a high-resolution scan of the photograph that was taken when the locomotive was delivered to JGJ in 1915. For the rounded corners, stencils were printed on adhesive paper.
First, we mark out the lines with red tape of the correct widths (15+5 mm) for the lines we want to achieve in the end, then painter’s tape is applied edge to edge with the red tape stripes. Finally, the stencils for the rounded corners are aligned and fixed into place. This makes it possible to see how it will look before we start to paint. Painting is the done in two layers, wet-on-wet. The tape is then removed promptly to avoid sharp paint edges. This technique gives a quite good result as can be seen below.

Efter vi linjerat bakväggen drogs Nian ut tillsammans med sitt äldre syskon KM en stund.
KM Nelsson väntar på en storrenovering som vi planerar börja med mycket snart.
After the back wall was lined out, we did a photo session with the two sister locomotives, the younger No. 9 (1915) and the older No 4. ”KM Nelsson” (1914). No 4 will receive a major overhaul that is planned to start soon.
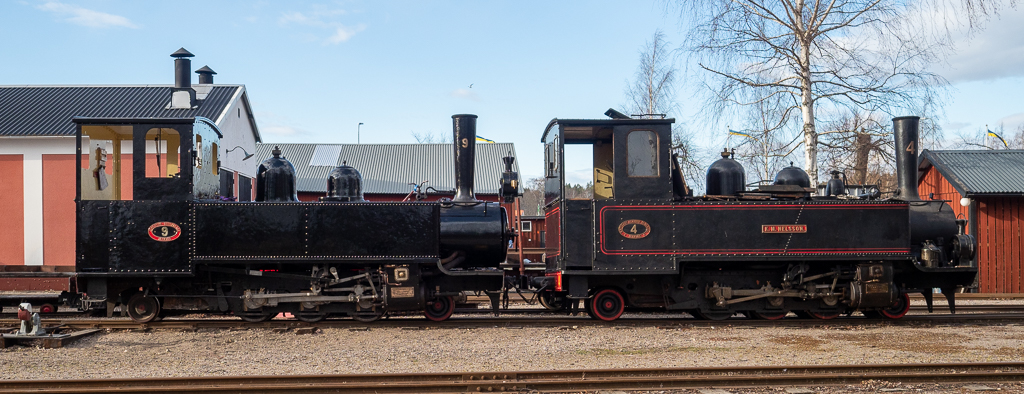
Syskonloken Nian och KM Nelsson. 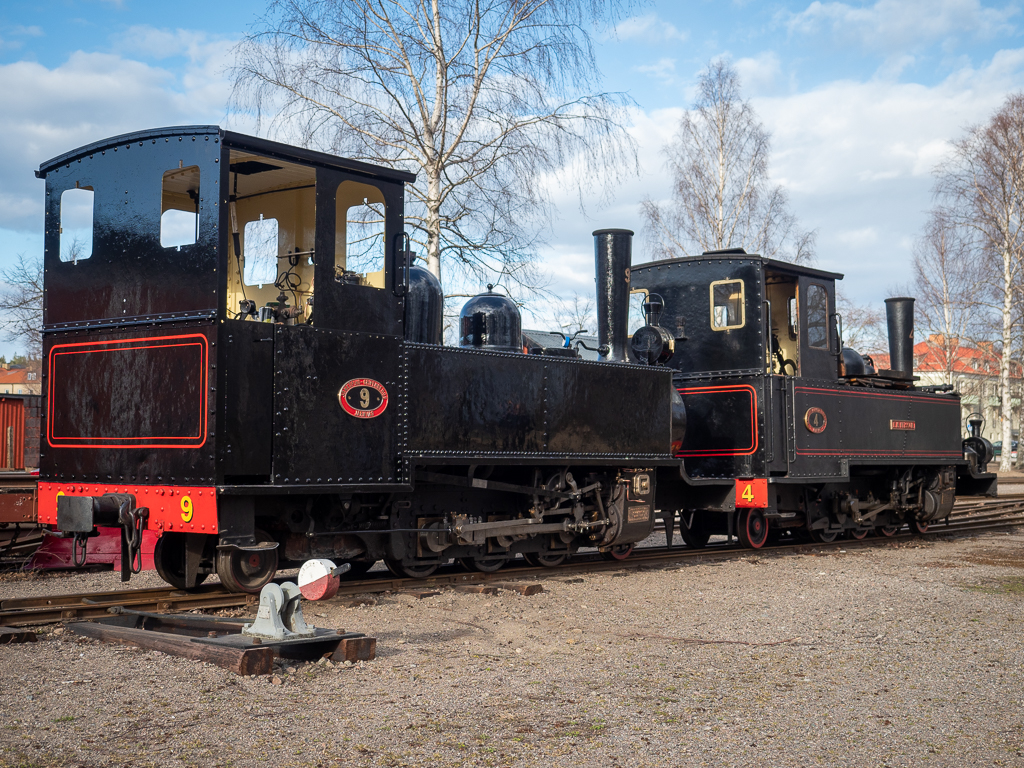
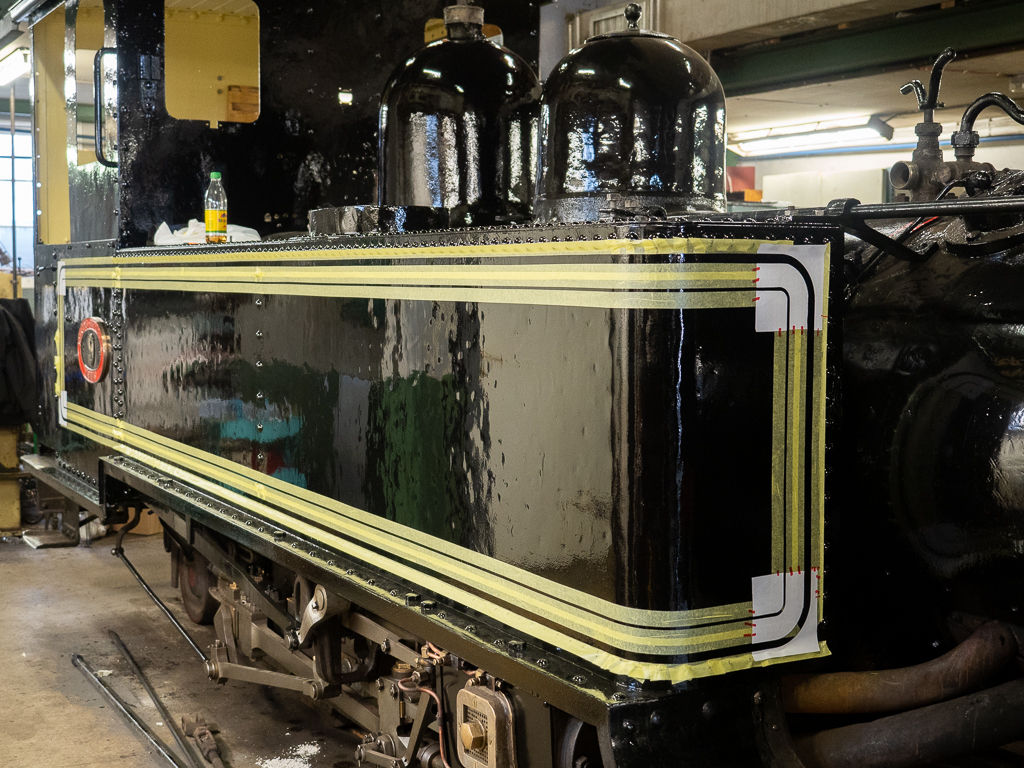
Sedan var det dags att linjera den ena sidotanken. Här använde vi precis samma metod som på bakväggen. Notera dock att den understa linjen ligger mindre än en millimeter ovanför nitraden i botten, detta gjorde att maskeringen tog lång tid och krävde lite funderande.
Encouraged by the good result with the lines on the back wall, we started with one of the water side tanks. This was quite difficult since the lower thick line is less than 1 millimeter above the rivets at the bottom – this complicated the masking, it took lots of time and effort to figure out how to apply the tape ensuring no paint would creep.
Markering. 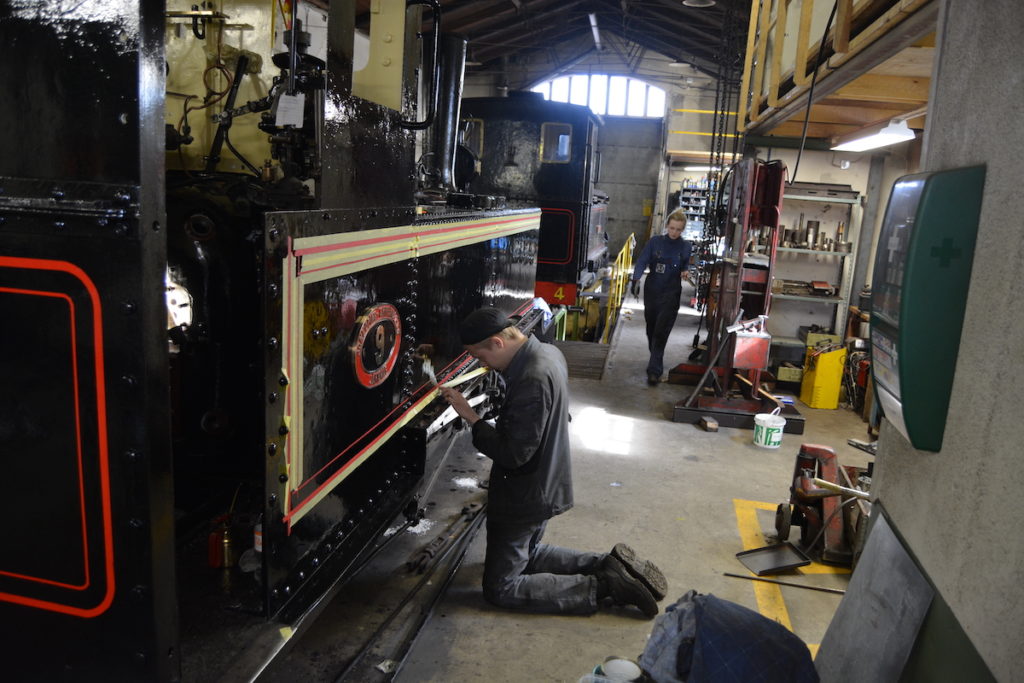
Maskering pågår 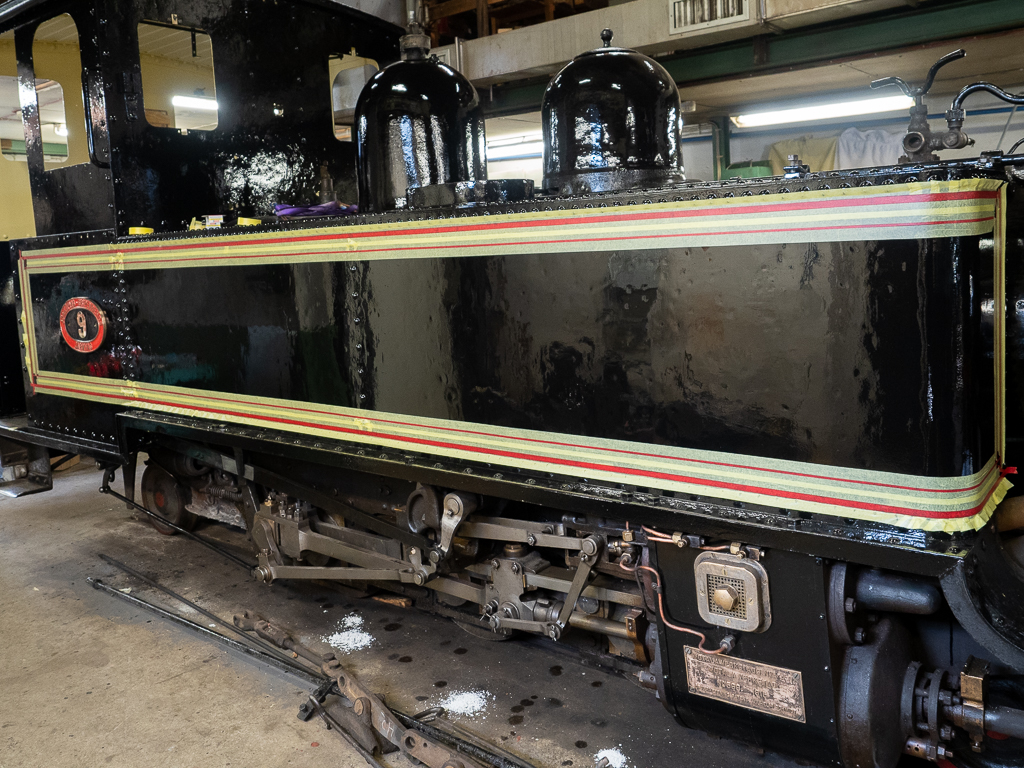
Maskering klar. 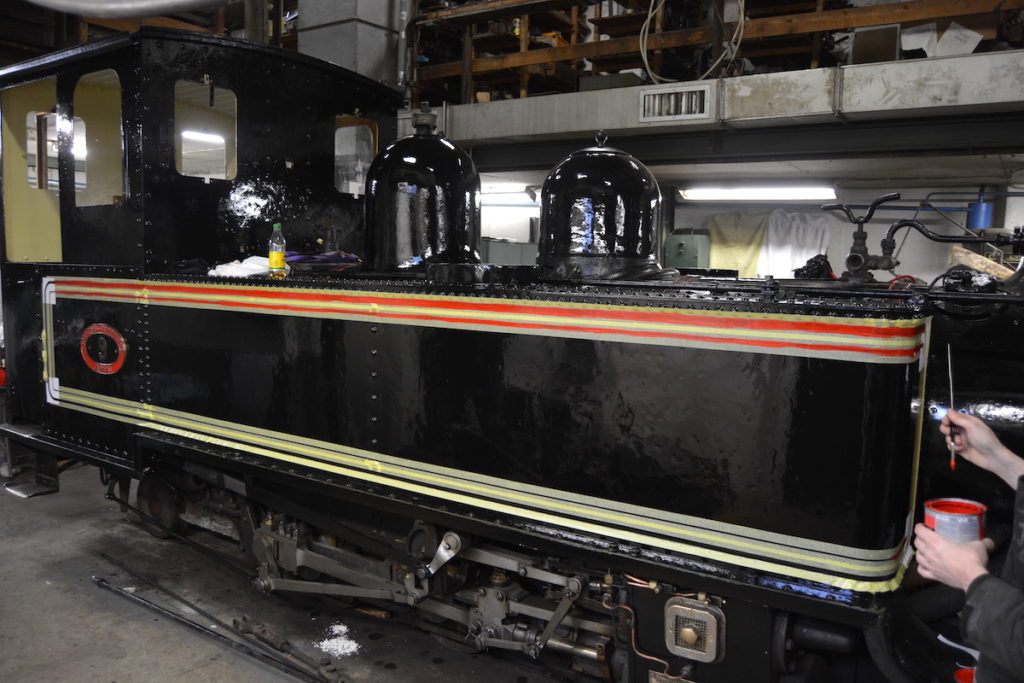
Målning. 
Tejpen avlägsnas försiktigt. 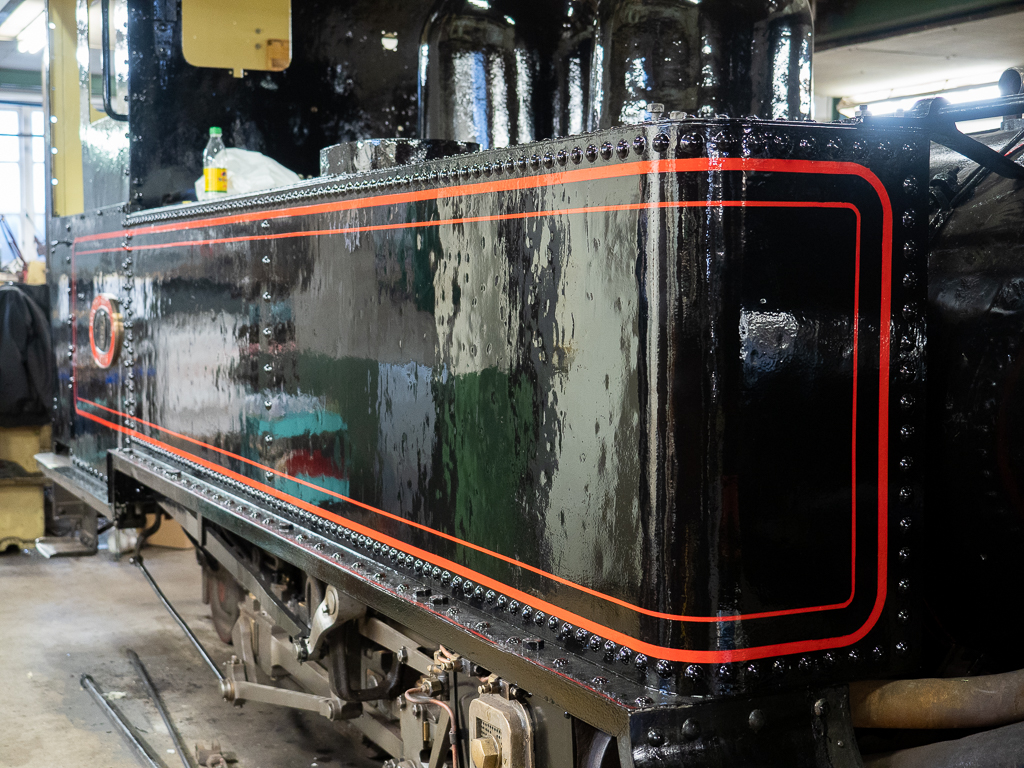
Utöver linjering har vi även monterat tillbaka alla fönster och smörjrören och andra detaljer i och utanpå hytten. Vi har dessutom schimsat pysventilerna för att få dessa att peka lite svagt nedåt.
We also did some other work; fitting of all the windows in the cab after a thorough cleaning and polishing, the lubrication pipes and other parts on the inside and outside of the cab. The bracket for the rear kerosene lantern was moved back to its original position.
The drain cocks on the right-hand cylinder have been refitted with thin brass shims to ensure the steam exhaust blows out slightly downwards.
Mycket polerande krävs för att få rent fönsterramarna. 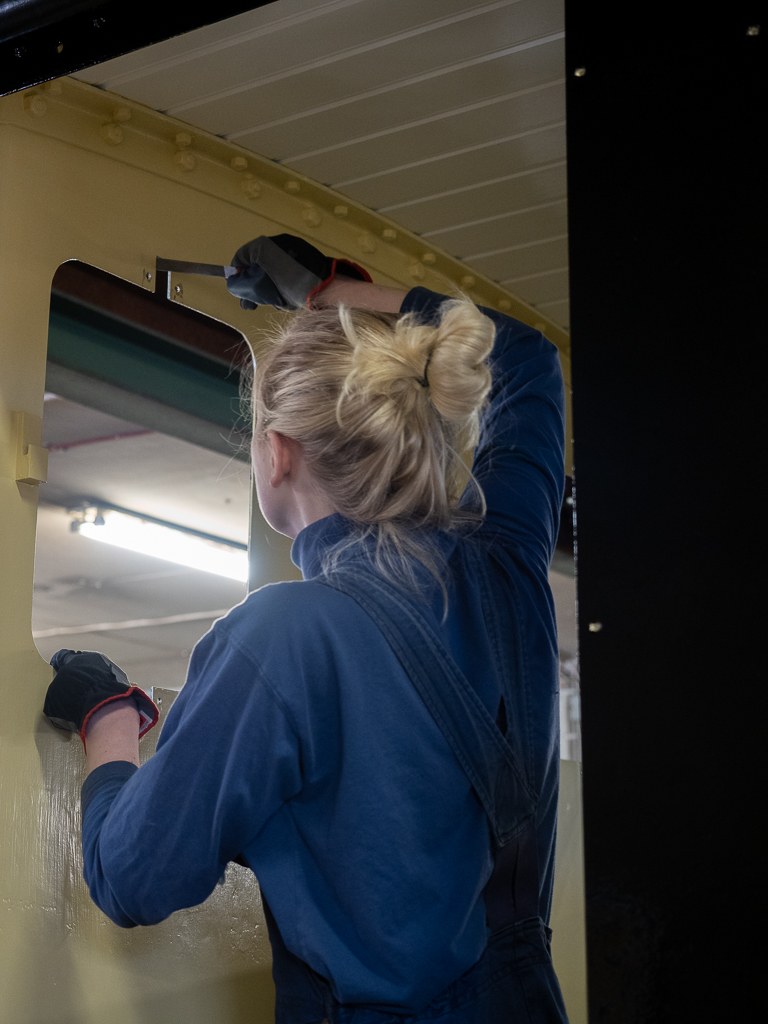
Innan fönsterna kan monteras behöver det justeras lite. 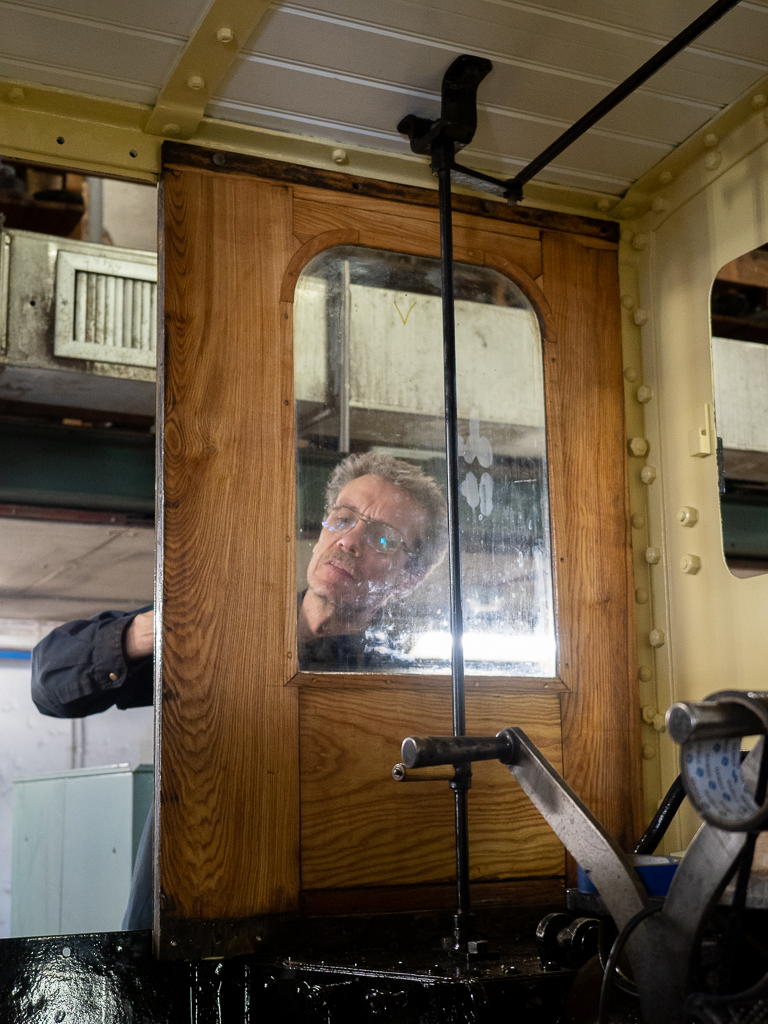
De renoverade sidofönsterna monteras, dessa täcks sedan av skjutluckor som kan dras för hyttöppningen om det skulle behövas. 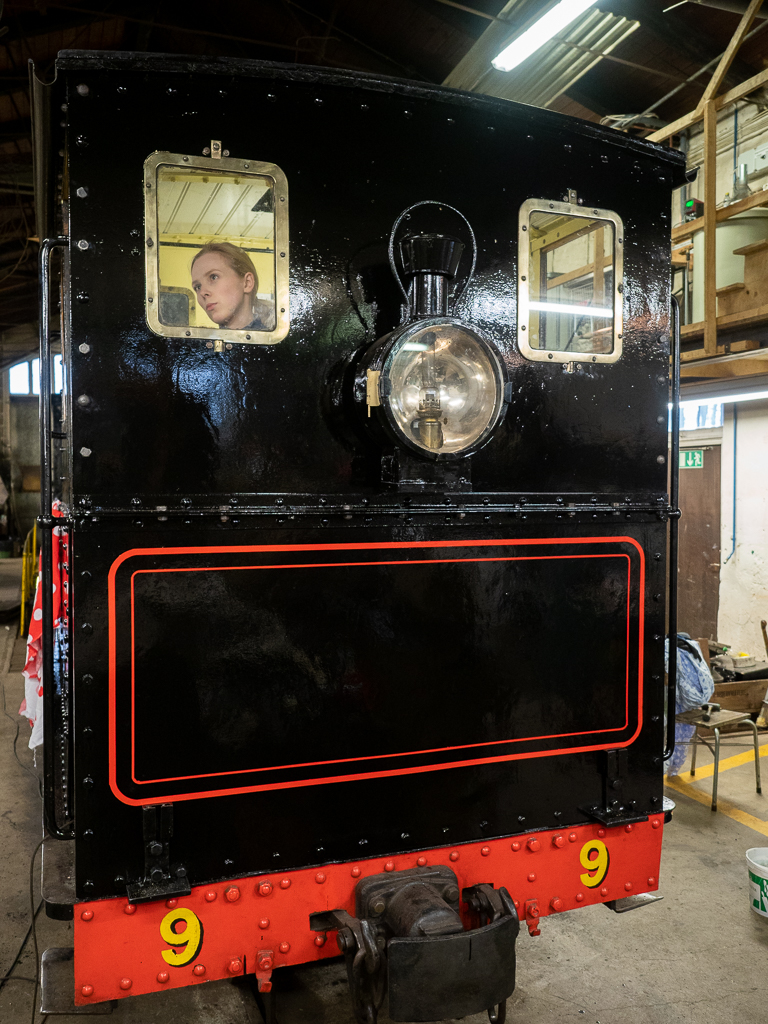
Bak på hytten har lykthållarna monterats, det i mitten är åter där det ska vara enl tillverkningsritningarna. 
Smörjrören går från smörjpumpen genom hyttväggen och sedan till cylindrarna. 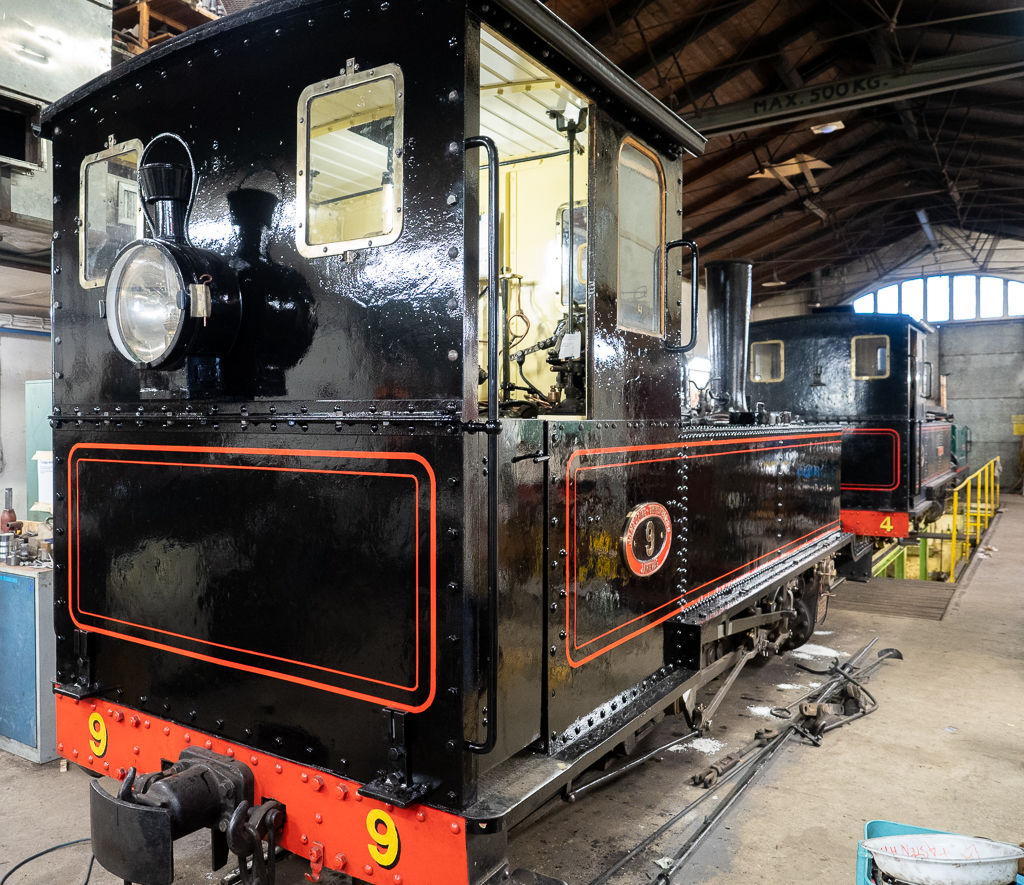
Nian börjar allt mer likna sitt syskon. 
Efter shimsning av pysventilerna pekar de svagt neråt /utåt som de ska göra – en hel del pyssel med att klippa ut tunna shims av mässingsplåt.